Connect to a Private Minecraft Bedrock Server 🎮
A step-by-step visual guide for consoles, PC, and mobile.
This guide should be followed for each and every network your device connects to. The settings are saved for the 'SSID' (name) of the network and your device
You can apply the DNS settings at the router level if you have multiple devices and don't want to do this for each device connecting to your network
Step 1: Get the Server Details
Before starting, you'll need two key pieces of information from the server owner:
- Server IP/Address:
leichmine.duckdns.org - Port:
19132
Step 2: Change Your Device's DNS Settings
This is the most crucial step. You will change your network's DNS to redirect the in-game server list
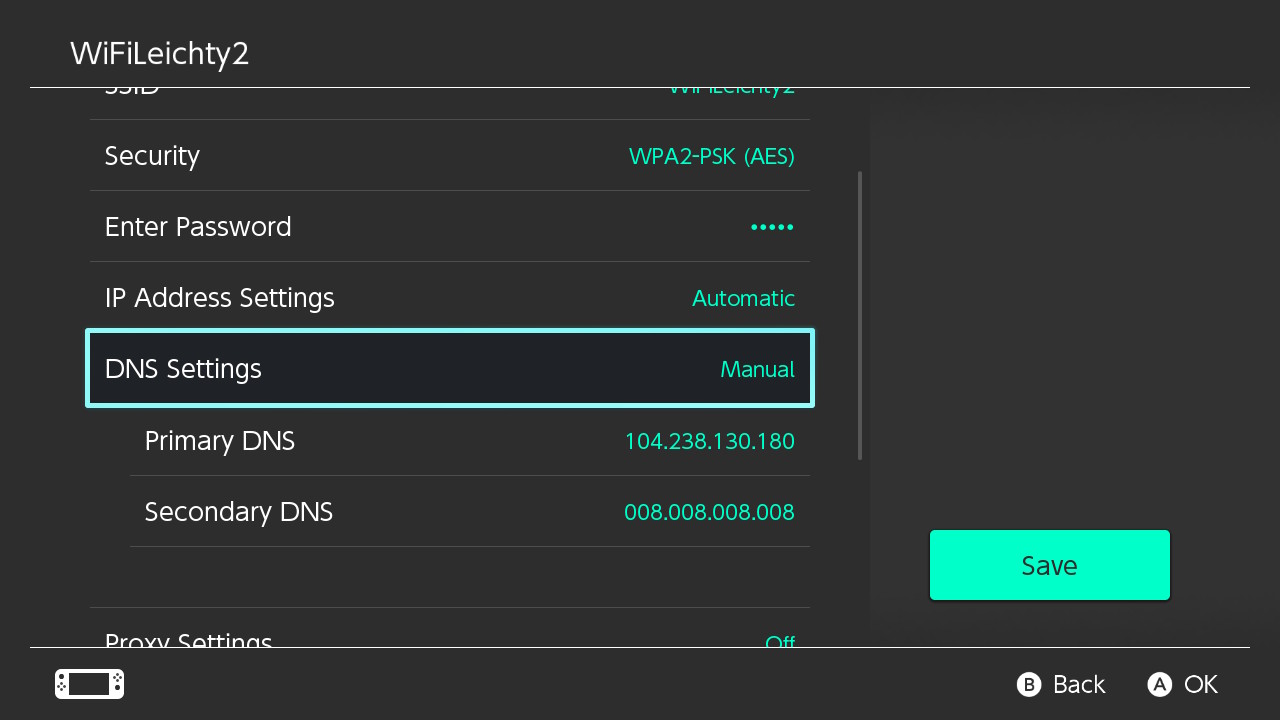
Primary DNS: 104.238.130.180
Secondary DNS: 1.1.1.1 (or 8.8.8.8)
Nintendo Switch
- From the Home screen, go to System Settings > Internet > Internet Settings.
- Select your Wi-Fi network and choose Change Settings.
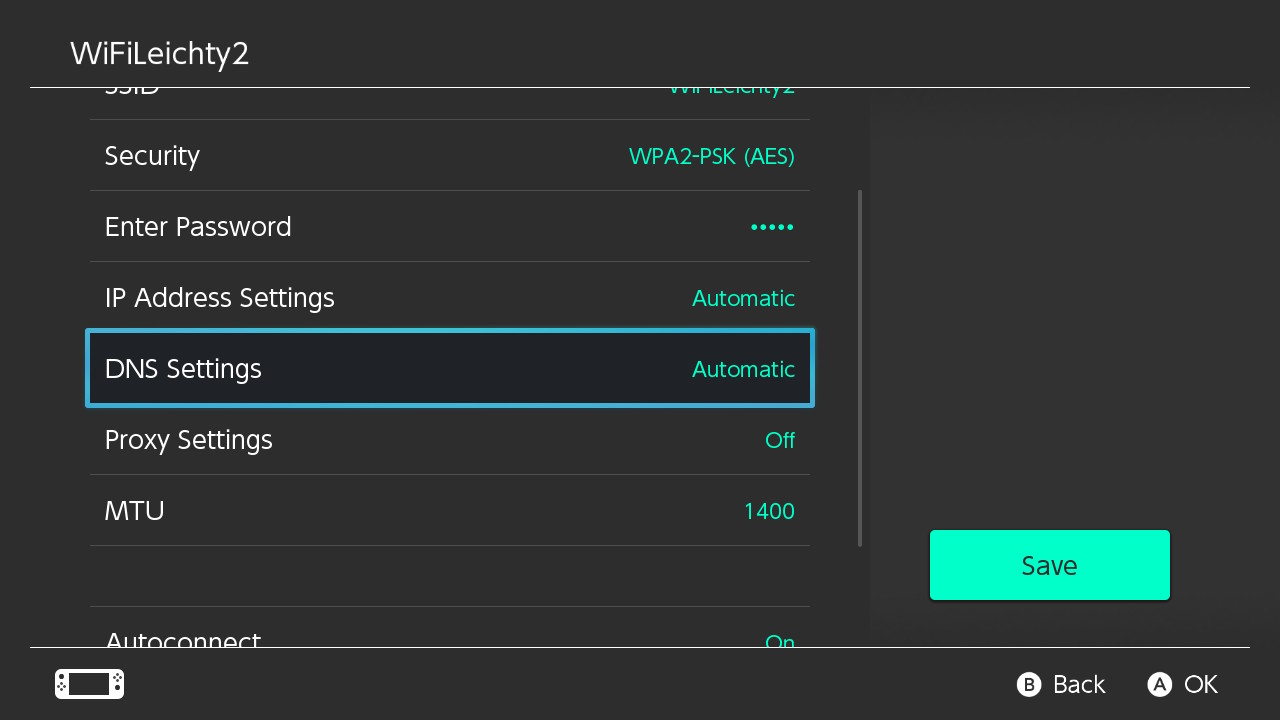
- Scroll to DNS Settings and change from Automatic to Manual.
- Enter the Primary and Secondary DNS addresses, then click Save.
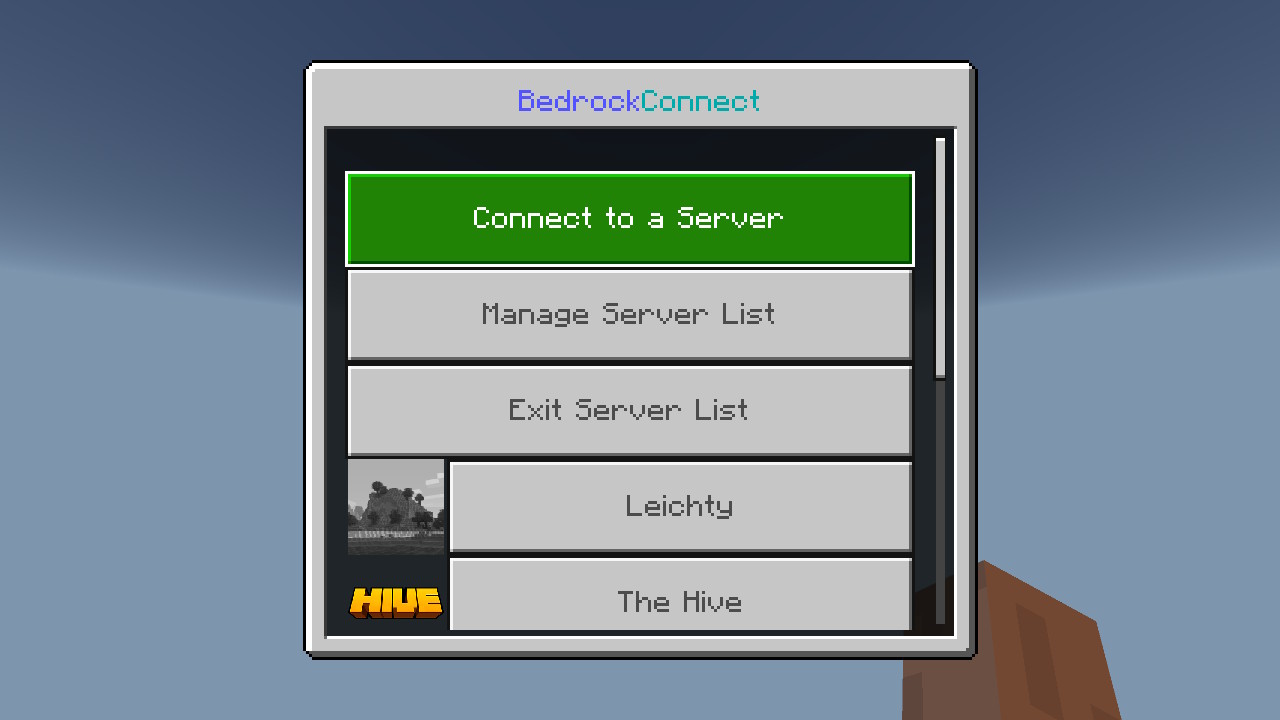
Step 3: Join the Server List in Minecraft
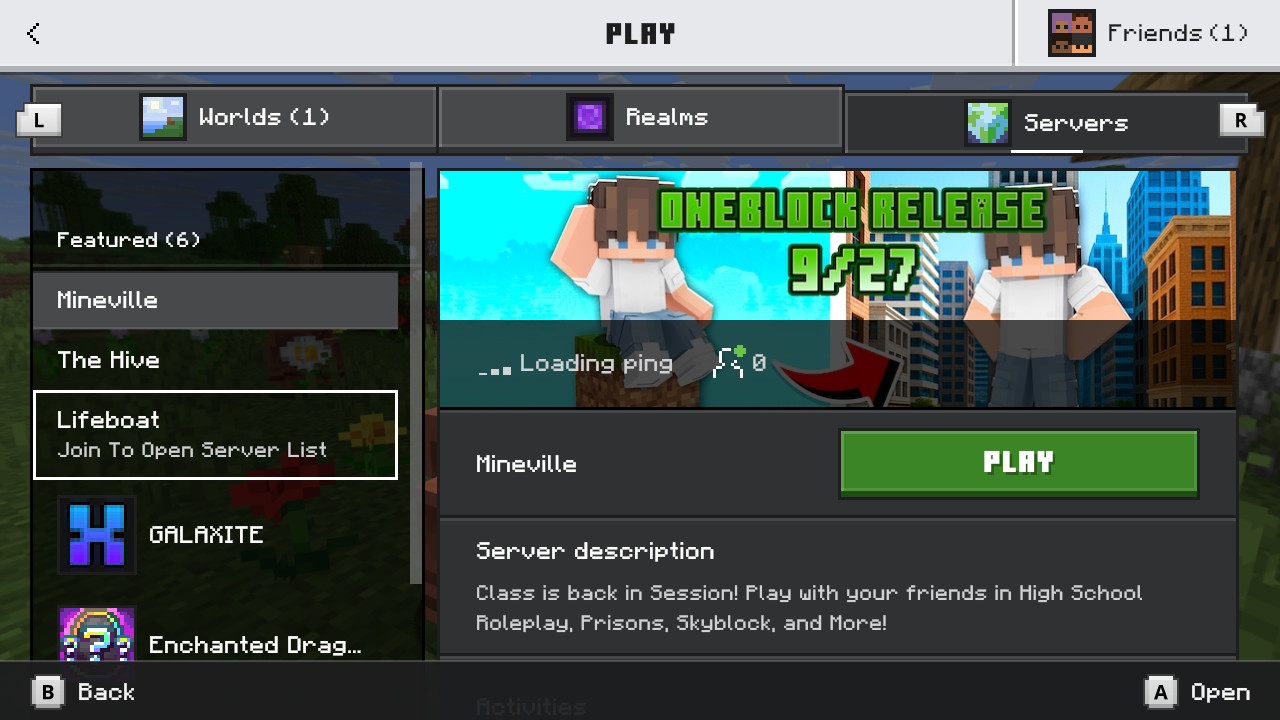
- Open Minecraft and go to the Play > Servers tab.
- Click on any of the featured servers that say "Join to Open Server List" (like The Hive, Mineplex, Lifeboat etc.).
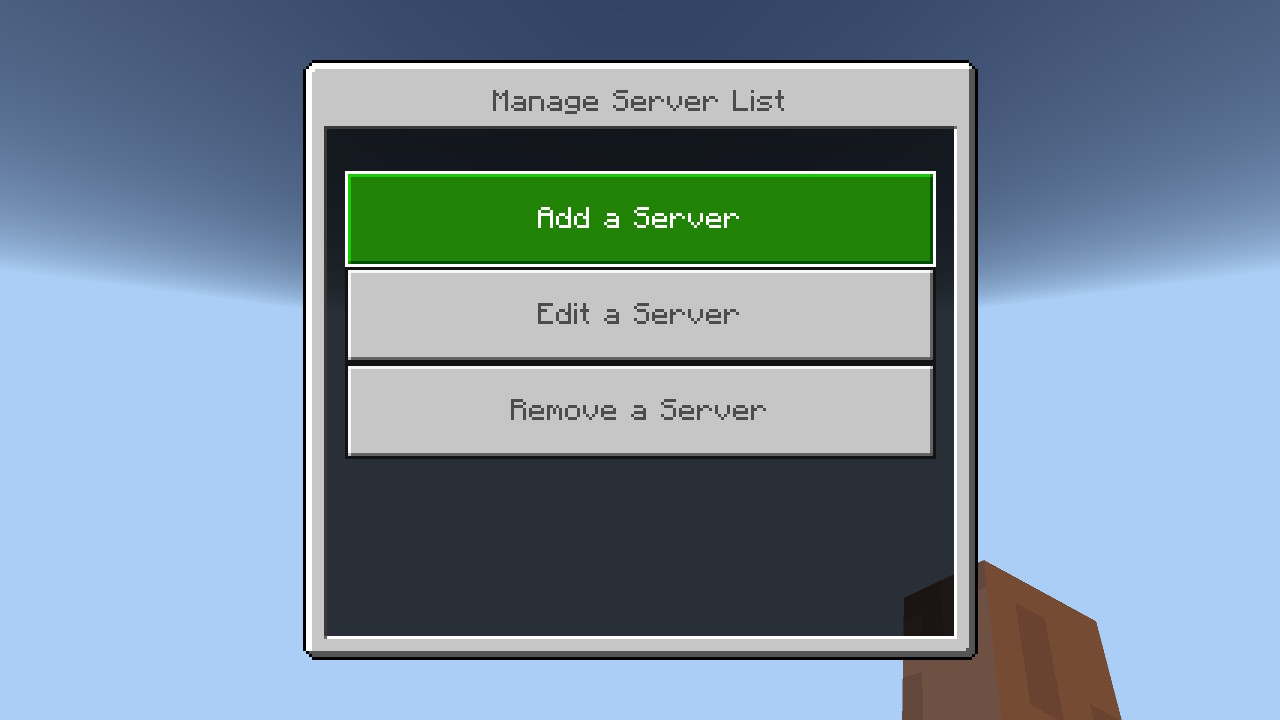
- After loading for a few moments, this will open the server menu. Select Connect to a Server or Manage Server List.
- If you clicked Manage Server List, now click Add New Server. Otherwise, skip this step
Note: It should say "Join to open server list". If none of the servers say this, either the DNS address was entered incorrectly, you need to restart the Switch, or you have to change the DNS settings on your router
Correct Configuration: Says 'Join To Open Server List'
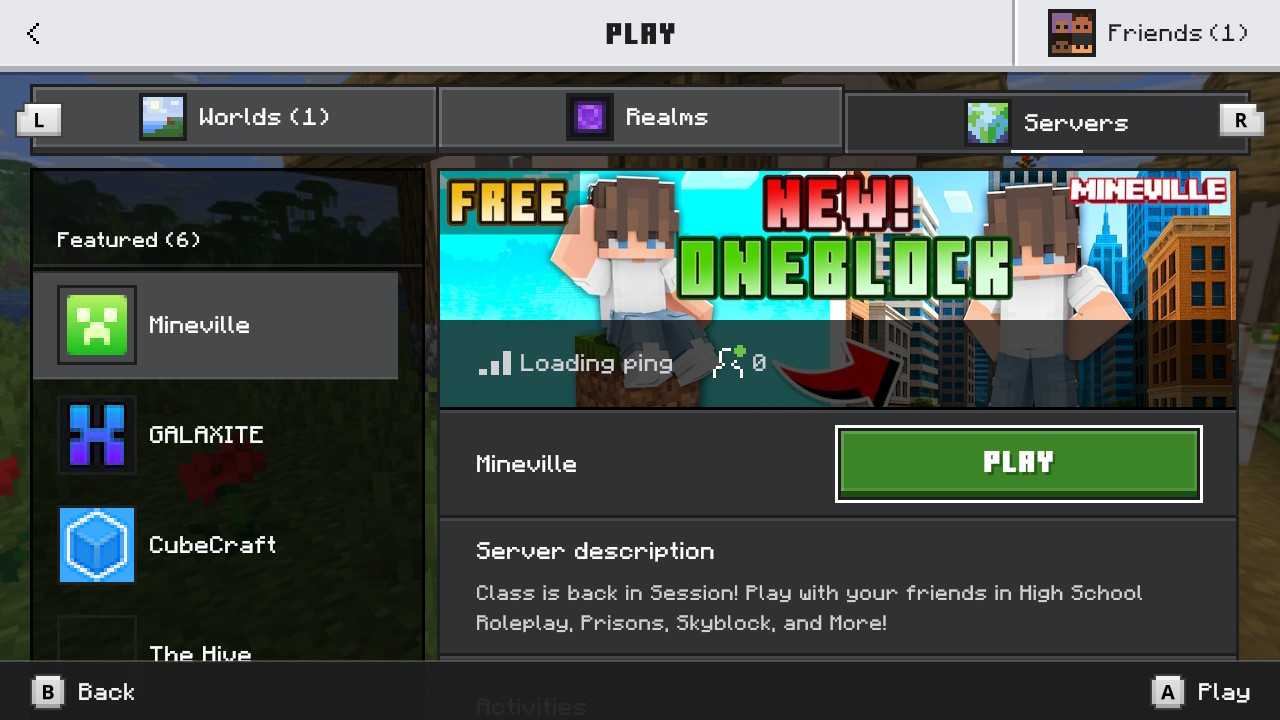
Incorrect Configuration: No 'Join', large icons on all
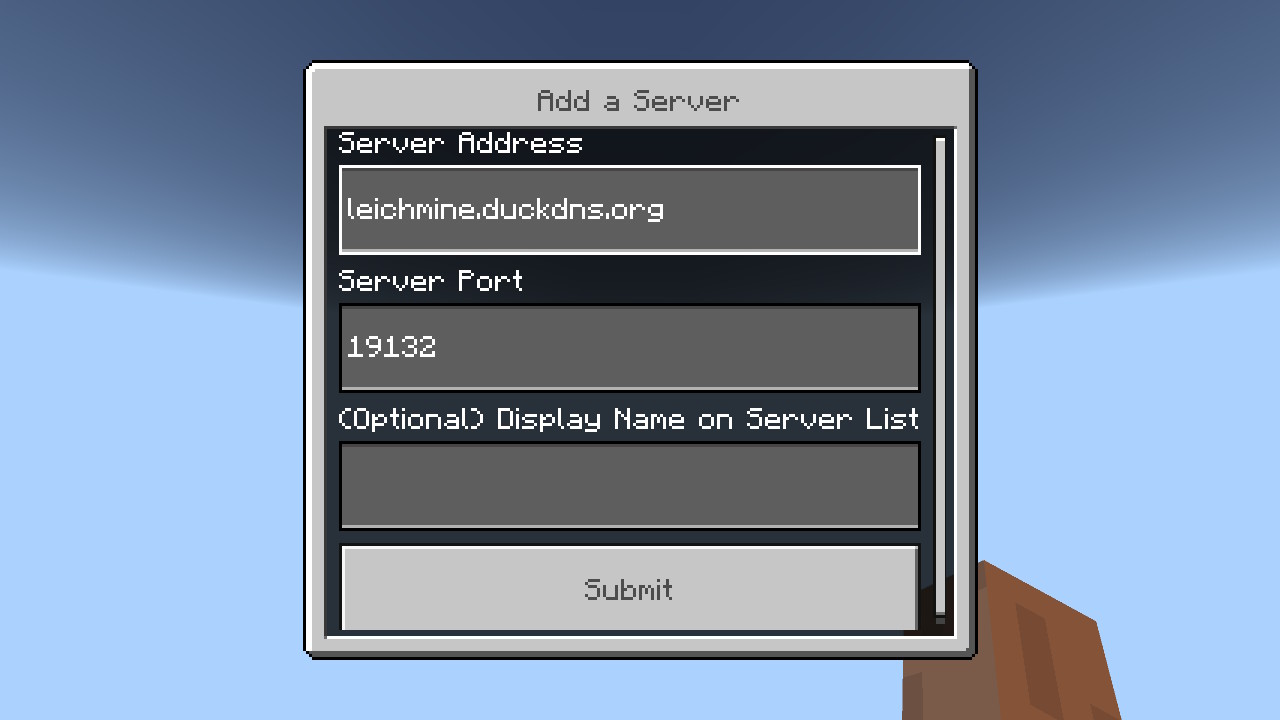
Step 4: Enter Your Server Details
- In the pop-up window, enter the Server Address (IP) and Port you got in Step 1.
- Server IP/Address:
leichmine.duckdns.org - Port:
19132 - Display Name:
Leichty-Server(can be anything) - Each time you click a featured server and 'Join to Open Server List', pick the server you added
- Click Submit to join
Note: The 'Display Name' will be shown in the server list every time you connect
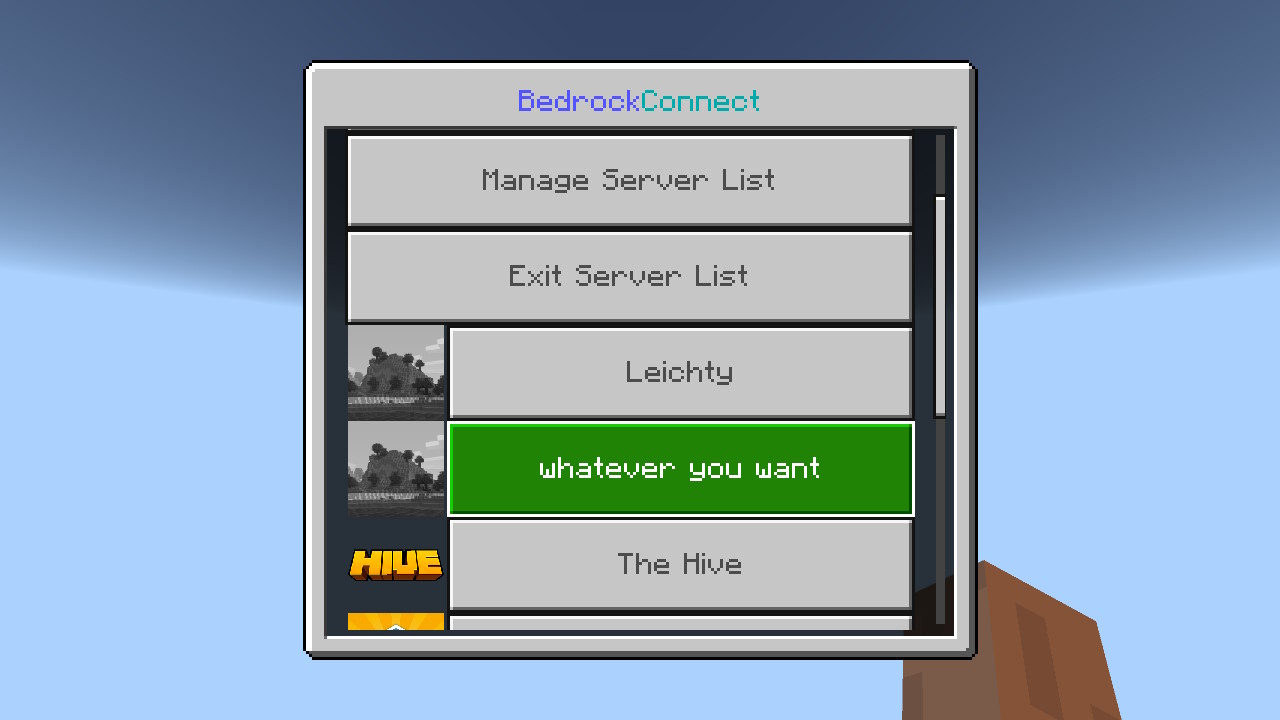
You should now be connected to your private server! 🎉
Note: You must follow this guide for each and every network your device connects to. The settings are saved for the 'SSID' (name) of the network that your device is connected to.